This post discusses and provides code examples of how to author a simple RuneLite plugin with an overlay. This post is part of a series about writing RuneLite plugins. Previously, I wrote posts about how to Configure the Build Environment for RuneLite, then provided a high-level overview of the General Structure of RuneLite Plugins, then provided details and code examples for Creating a RuneLite Plugin Config Menu.
This time, we delve deeper and actually start writing some useful code! The end result is a simple plugin with an overlay. The plugin example we are going to cover is an overlay to display the current world that a player is logged in on. This plugin is pretty simple and makes for an excellent example. However, it is a pretty useless plugin for enhancing game experience! This is mainly becuase the current world information is already avialable in the client… but I thought it was a good, simple example to use for this tutorial. I also think the overall technique used in this post is readily transferable to other similar plugins where you want to use a basic text-box style overlay to display some type of information.
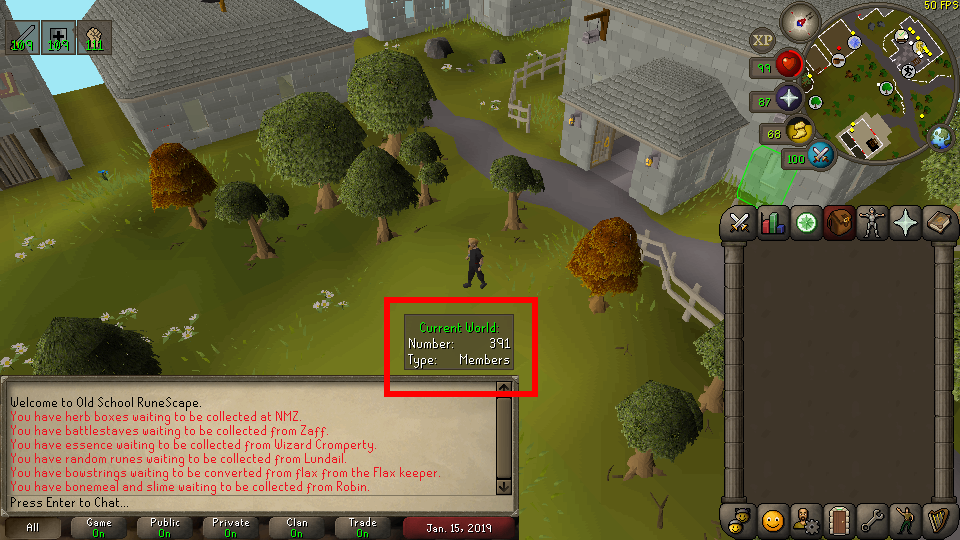
To give you an idea of what the end result will be, the image below shows a RuneLite client with the plugin highlighted in red.
Contents
Creating a RuneLite Overlay Plugin
As with any RuneLite plugin, I started by picking a name: CurrentWorld. This seemed descriptive! The following subsections cover the basics of authoring a RuneLite plugin with an overlay. We start with the basics and create the plugin package and classes. Then we create a simple configuration menu, write the code for the plugin to function, and finish it off by configuring an overlay to display information on-screen in the client.
The post begins with the expectation that you have already downloaded the RuneLite source code from GitHub, and have sucessfully built and run RuneLite using the IntelliJ IDE. If this is not the case, I would recommend you read my post on Configure the Build Environment for RuneLite.
Create the Plugin Package
As I have discussed in previous blog posts about RuneLite plugin development, to start writing a plugin you need to make a package with classes. The RuneLite plugin directory is in the following location in your runelite folder.
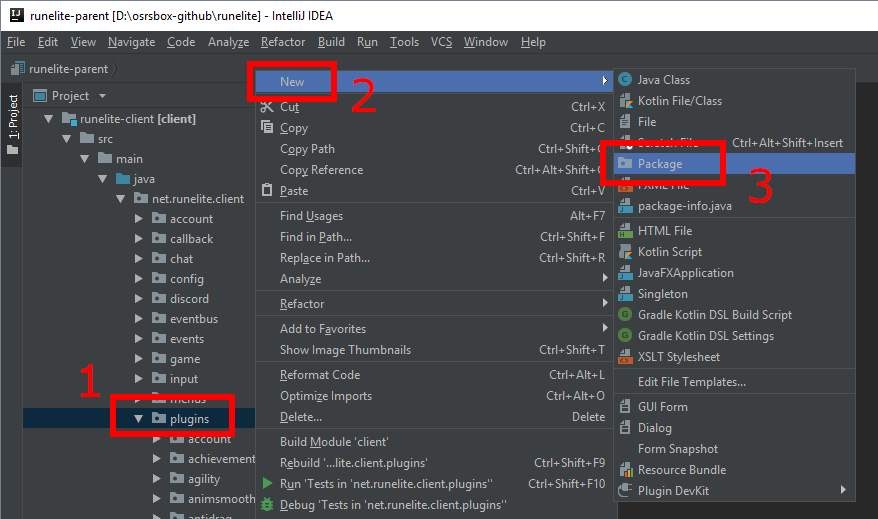
runelite/runelite-client/src/main/java/net/runelite/client/plugins/To start, you need to make a package in the plugins folder. This is pretty much a folder to store the files we will create. This process is quite simple: right-click on the plugins folder in the Project pane, select New, then select Package. A visual example of how to make the package is displayed below.
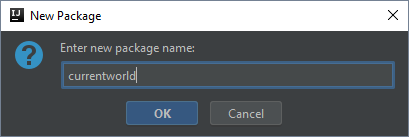
After creating a new package you will be prompted to provide a name. Since my plugin is called CurrentWorld I named the package currentworld. This name should be lowcase without symbols - this seems to be the convention used by other RuneLite plugins.
Create the Plugin Classes
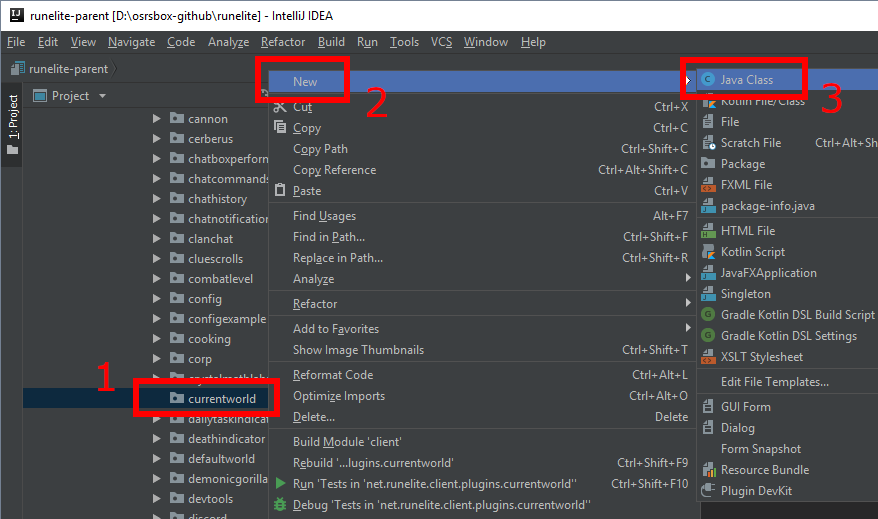
The next step is to populate the newly created package with Java classes. These are individual data files that will house the source code for our plugin. This process is quite simple: right-click on the package you just created in the Project pane (called currentworld), select New, then select Class. A visual example of how to make the package is displayed below.
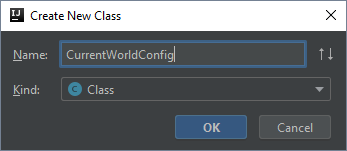
Similar to creating a new package, when creating a class you will be prompted to provide a name. A visual example of the naming interface is provided below.
I made three different Java classes to start plugin development. If you look at any of the source code files for existing RuneLite plugins on their GitHub repository, you will see that most plugins have similar file names. That is the name of the plugin, followed by a string to identify the purpose of the file, including: Plugin, Panel, Overlay, and Config. Each of the classes I created are discussed below, including the intended purpose of each class.
CurrentWorldConfig.java: Hold configuration options for the plugin which are used to build the configuration menu. This is visible in the Settings panel in the RuneLite client and used to toggle/set different configurations for the pluginCurrentWorldOverlay.java: Builds the overlay text-box on the clientCurrentWorldPlugin.java: Main plugin files that performs most of the plugin management (starting, stopping, handling events etc.)
You can view all the code and the structure I used by looking at my orsrsbox-plugins branch of my forked version of the official RuneLite repository on GitHub. The base files for the currentworld plugin show the three files used to create the plugin.
Create the Config Class
The RuneLite config system provides developers the functionality to make complex configuration menus for their plugins with very little effort. For in-depth information on the plugin configuration options, have a look at my Creating a RuneLite Plugin Config Menu post. This section will only cover the basics implemented in the CurrentWorld plugin.
From my experience, the best method to determining what configuration options to include come from: 1) Using other RuneLite plugins as inspration, 2) Think about what should be toggled on, off or changed somehow in your plugin, and 3) Feedback from other players. However, this tutorial is going to keep it simple by providing one basic configuration option as a demonstration of functionality. I want one configuration that is toggleable to display the type of world. For example, displaying if you are logged in to a Members, or F2P world. Therefore, by default the plugin should only show the current world number, and display the world type when it is enabled in the configuration menu.
The full source code I used for the CurrentWorldConfig.java file is provided below for reference. I will not go into detail here, as my previous post about RuneLite plugin configuration menus should be read instead. It covers the basics of configuration files and the different types of configuration options you can have (e.g., booleans, integer boxes, combo-boxes etc.).
package net.runelite.client.plugins.currentworld;
import net.runelite.client.config.Config;
import net.runelite.client.config.ConfigGroup;
import net.runelite.client.config.ConfigItem;
@ConfigGroup("currentworld")
public interface CurrentWorldConfig extends Config
{
@ConfigItem(
position = 1,
keyName = "showWorldType",
name = "Show the current world type",
description = "Toggle the display of the current world type"
)
default boolean showWorldType()
{
return false;
}
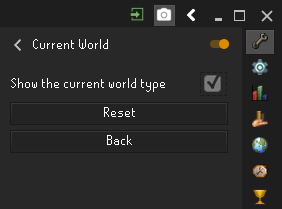
}To finish things off here, a visual example of the configuration menu is displayed below. Note that there is a single menu entry, that is toggleable using a simple checkbox. When this is clicked it turns from false to true and can be called within the plugin code.
Create the Plugin Class
So far we have created a plugin structure and set configuration options for the plugin. Next, we need to write the core of the plugin in the CurrentWorldPlugin.java file. This plugin ended up a little different, in that most of the plugin details are so simple that the overlay class (CurrentWorldOverlay.java) has most of the code. For example, the code to determining the current world is in the overlay file. Depending on the type of plugin you are creating, you might approach this differently and put code in different, more logical places. For example, adding another class (e.g., CurrentWorld.java) to store data, or additional methods in the plugin class to calculate stuff or listen to events. Nevertheless, this is the approach I took for the CurrentWorld plugin.
Every RuneLite plugin should have PluginDescription properties. The common properties to include are the name of the plugin, a description of the plugin displayed when mouse hovering in the settings menu, and tags for the configuration menu search function. The PluginDescriptor.java file provides a summary of the expected requirements for description and tags. In addition, there are other properties available including enabledByDefault, hidden, developerPlugin and loadWhenOutDated. The most useful of these seems to be enabledByDefault so that a plugin is started (enabled by default) when the client is loaded. Below is a snippet of the PluginDescription used in the CurrentWorld plugin.
@PluginDescriptor(
        name = "Current World",
        description = "Show the current world as an overlay",
        tags = {"world", "overlay"}
)
Next, we need to create the class for the plugin. A key aspect here is that the class we make needs to extend the Plugin class. A simple example is provided below using my CurrentWorldPlugin class.
public class CurrentWorldPlugin extends Plugin
{
    // Plugin code goes in this class!
}
Inside our new class we are going to start writing our plugin. We do not need to add much here, basically just inject the overlay manager (so that we can create an overlay), and inject our own overlay and config files. If you have not used depency injection before and the @Inject annotation seems bizzare to you, have a read of Dependency Injection with Code Examples, or Dependency Injection for beginners. The simplest I can explain it is: we are making other stuff available in our plugin class (this is a very simple explanation). For example, if we injected the client it would be available to execute functions such as client.getWorld() to return the world number. Reviewing other RuneLite plugins is a good place to see what other developers inject and why. The listing below shows the start of the CurentWorldPlugin class.
public class CurrentWorldPlugin extends Plugin
{
    @Inject
    private OverlayManager overlayManager;

    @Inject
    private CurrentWorldOverlay overlay;

    @Inject
    private CurrentWorldConfig config;

    @Provides
    CurrentWorldConfig provideConfig(ConfigManager configManager)
    {
        return configManager.getConfig(CurrentWorldConfig.class);
    }
}
The next step is essential to add functions that run when the plugin is started (named startUp) and stopped (named shutDown). I haven’t found any documentation about these methods from RuneLite, but from my research it seems to be part of the Google Guava project and used for services. If any readers can shed some more light, please leave a comment and educate my minimal-knowledge-of-Java mind!
Anyway, in the startUp and shutDown methods, I have simply added the code to make the overlayManager add or remove the CurrentWorld plugin overlay. Basically, when the plugin is started the overlay is added. When the plugin is stopped the overlay is removed. The starting and stopping of the plugin is handled in the Settings menu in the RuneLite client, and is the orange coloured sliding toggle to turn plugins on or off. The code used to achieve this is listed below.
public class CurrentWorldPlugin extends Plugin
{
    ...

    @Override
    protected void startUp() throws Exception
    {
        overlayManager.add(overlay);
    }

    @Override
    protected void shutDown() throws Exception
    {
        overlayManager.remove(overlay);
    }
}
That is it. Our plugin file is pretty short and simple in this example. However, for most plugins there is a lot of extra code in this Plugin file. Just have a look in the RuneLite plugins folder on GitHub for other plugin files that end with Plugin to get an idea. And remember, this is a very simple plugin in comparison to the plugins shipped with the RuneLite client.
For reference, the full plugin (minus the copyright license header) is displayed in below. I did not discuss anything about the required imports in this section, but if you need to use @Inject, @Provides, or any other Java Annotation - you will need to import the according class. The same goes for any RuneLite classes you wish to use. The IntelliJ IDE helps a lot with identifying these if you are just starting out using the RuneLite classes and API.
package net.runelite.client.plugins.currentworld;

import com.google.inject.Provides;
import javax.inject.Inject;
import net.runelite.client.plugins.Plugin;
import net.runelite.client.plugins.PluginDescriptor;
import net.runelite.client.config.ConfigManager;
import net.runelite.client.ui.overlay.OverlayManager;

@PluginDescriptor(
        name = "Current World",
        description = "Show the current world as an overlay",
        tags = {"world", "overlay"}
)
public class CurrentWorldPlugin extends Plugin
{
    @Inject
    private OverlayManager overlayManager;

    @Inject
    private CurrentWorldOverlay overlay;

    @Inject
    private CurrentWorldConfig config;

    @Provides
    CurrentWorldConfig provideConfig(ConfigManager configManager)
    {
        return configManager.getConfig(CurrentWorldConfig.class);
    }

    @Override
    protected void startUp() throws Exception
    {
        overlayManager.add(overlay);
    }

    @Override
    protected void shutDown() throws Exception
    {
        overlayManager.remove(overlay);
    }
}
Create the Overlay Class
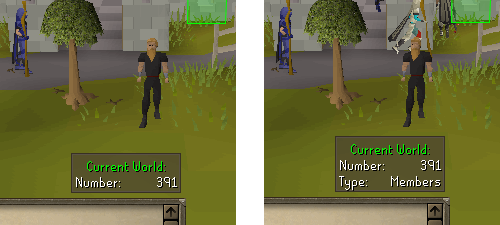
The last part of the plugin we should create is the actual overlay that is displayed on the client. To reiterate what we are trying to do: create a simple overlay which displays the current world number. Also, it should optionally display the type of world, being either free-to-play (display Free) or pay-to-play (display Members). The end result is displayed in the image below. The default overlay is on the left, and on the right is the overlay with the added world type.
Similar to the plugin file, we need to create the class for the overlay. A key aspect here is that the class we make needs to extend the Overlay class. A simple example is provided below using my CurrentWorldOverlay class.
class CurrentWorldOverlay extends Overlay
{
    // Overlay code goes in this class!
}
Next we want to initialize some class variables for the client and config so we can access these from the overlay class. We want to access the client so that we can execute the getWorldType() function and determine the world number and the getWorldType() function to determine if the world is F2P or Members. We want access to the config so we can determine if the showWorldType configuration option for the plugin is enabled (set the true). If it is enabled, we need to also display the world type.
Another thing mixed in the works is the creation of the PanelComponent, which is the object type used to actually build the overlay and style it. To achieve this we create a new PanelComponent object, and also set the position. According to the RuneLite API for OverlayPosition there are a collection of constants that can be used to place the overlay in a variety of place in the client. I settled with ABOVE_CHATBOX_RIGHT for the CurrentWorld plugin. This can be moved on the fly by the user by holding Alt and moving the overlay - a function built into the RuneLite client.
The code to initialize the client and config, and also create the PanelComponent overlay is displayed below.
private final Client client;
private final CurrentWorldConfig config;
private final PanelComponent panelComponent = new PanelComponent();

@Inject
private CurrentWorldOverlay(Client client, CurrentWorldConfig config)
{
    setPosition(OverlayPosition.ABOVE_CHATBOX_RIGHT);
    this.client = client;
    this.config = config;
}
The last thing to finish off is creating the overlay (PanelComponent) and populating it with data. This is achieved in the render function. The code may look a little complex at first if you have not used graphics in Java or used the PanelComponent before, but it is quite easy to use. As a basic example of usage, you can set a title and write lines. Of course you can do other amazing things - for example, take a look at the athetically pleasing XP Globes plugin graphics.
For the CurrentWorld plugin, I decided to set a title to Current World: and set it to be a green color. Then I set a specific horizontal size to make it look neat and tidy. Finally, I added a line to display Number: on the left, and the actual world number on the right of the line. The only dynamic content here is the world number, which is determined by querying the client for the current world using the client.getWorld() function. A shortened version of the render function is displayed below, which does not have the code for toggling display of the current world type (marked by a placeholder comment).
@Override
public Dimension render(Graphics2D graphics)
{
    panelComponent.getChildren().clear();
    String overlayTitle = "Current World:";

    // Build overlay title
    panelComponent.getChildren().add(TitleComponent.builder()
            .text(overlayTitle)
            .color(Color.GREEN)
            .build());

    // Set the size of the overlay (width)
    panelComponent.setPreferredSize(new Dimension(
            graphics.getFontMetrics().stringWidth(overlayTitle) + 30,
            0));

    // Add a line on the overlay for world number
    panelComponent.getChildren().add(LineComponent.builder()
            .left("Number:")
            .right(Integer.toString(client.getWorld()))
            .build());

    // Show world type goes here ...

    return panelComponent.render(graphics);
}
In the previous code snippet I finished off the basic overlay to display the current world. One final step… add the configurable option of displaying the world type of Free or Members. This is pretty simple to add, as we have access to the config which holds the variable for the configurable options named showWorldType. We can simply add an if statement to check if the option is enabled (set to true). Then query the client for the world type using client.getWorldType() which returns a list (technically a set) of strings about the type of world (e.g., BOUNTY, PVP, SKILL_TOTAL, MEMBERS). If WorldType.MEMBERS is in the list it must be a members world, otherwise a free-to-play world! Then add the line to the overlay as we did in the previous example. The code is documented below for reference.
    // If showing world type, determine world type and add the extra line
    if (config.showWorldType())
    {
        EnumSet<WorldType> worldType = client.getWorldType();
        String currentWorldType;

        if (worldType.contains(WorldType.MEMBERS))
        {
            currentWorldType = "Members";
        }
        else
        {
            currentWorldType = "Free";
        }

        panelComponent.getChildren().add(LineComponent.builder()
                .left("Type:")
                .right(currentWorldType)
                .build());
    }
I won’t put the full code snippet here for the overlay, becuase the render method is pretty lengthy. But you can checkout the currentworld plugin on my GitHub to see the complete source used in this post, including the Plugin, Overlay and Config files.
Building and Running RuneLite
From here you should be able to build the RuneLite project again, then run the client. Make sure you have Developer Tools enabled in the Edit Configurations menu, and maybe debugging enabled (this example did not use any debugging statements, but I would recommend using them when writing plugins).
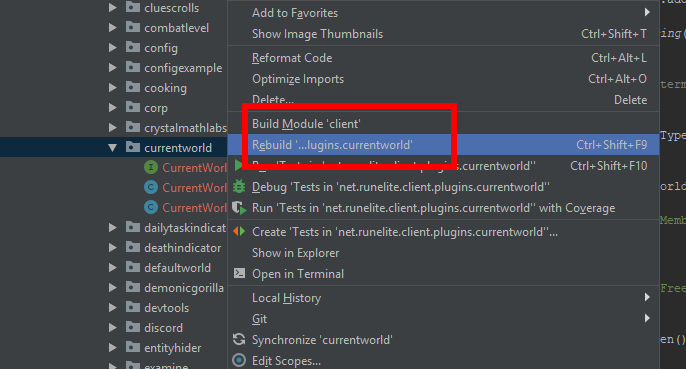
One hint I found along the way. I previously built the entire RuneLite project everytime I made a small change to my plugin. This process takes quite a decent amount of time, and when you make small changes to your plugin and re-build the time adds up. If you only make changes to your plugin (and nothing else in the project) just rebuild your specific plugin, then run the RuneLite client from the IDE again. A visual example is provided below on how to rebuild just a single plugin.
Additional Thoughts
I found it very difficult to write this post. There are so many ways to go about coding even a simple plugin like the CurrentWorld plugin we investigated. Furthermore, Java is not my native tounge (!) so some of the best practices were difficult to perfect. If you have any feedback on this, please leave a comment - I would rather improve and correct anything wrong in this post, than live with my head in the sand like an emu. Anyway, here is a list of additional thoughts I had during and after this plugin journey:
- This plugin is useless! But it does make for a good example.
- Even if you did see the merit in having a current world overlay, the style in this example is crap. I think a one-line overlay would be sufficient, which just said
World: 390or similar. - Why this coding approach? I thought a lot about using an additional class to store world data, or using the
Worldclass to query the world properties. It seemed simpler by putting the code in the overlay class for this project, but I would not recommend this approach for any serious plugin development.
Conclusion
As I mentioned previously, have a look at the full currentworld plugin on my GitHub to see the complete source used in this post. However, my best advice would be reading the code from other plugins to see how other developers have approached authoring specific plugins. This is where I do all my learning. And it is very difficult to share this knowledge - I feel like it could fill up an entire book!
I hope this post helped you understand the RuneLite plugin overlay system and helped you start developing RuneLite plugins. As always, please leave a comment below if you notice any errors, or have any feedback. I really enjoy writing these posts and really hope that you have found it useful and informative! Thanks, and happy scaping everyone.