This post provides an in-depth tutorial on how to configure a Vanilla, or Classic, World of Warcraft server. Yeah, I know… this is not exactly an Old School RuneScape (OSRS) topic, but I think that it may be interesting to readers who are excited about the prospect of WoW Classic. I embarked on making my own Vanilla WOW server because I wanted some practice before the official Blizzard version launched. Hopefully, you will also find this information useful.

This post follows directly on from my last post entitled: Installing a WoW Vanilla Private Server on Ubuntu Linux. If you want to follow this tutorial, it is expected that you start from the first post!
This post is a part two of a two-part series:
- Part 1: Installing a WoW Vanilla Private Server on Ubuntu Linux is the first post in this series, which covers server installation.
- Part 2: Configuring a WoW Vanilla Private Server on Ubuntu Linux is this post, which covers server configuration and management.
Contents
- Running your Vanilla WOW Server
- Connecting your WoW Client to your Server
- Modifying the Database
- Modifying the Server at Runtime
- Firewall
- Conclusion
Running your Vanilla WOW Server
At the end of the last post, we finished with a freshly installed and partially configured WoW vanilla private server using the Continued MaNGOS project (cMaNGOS for short). In that post, we did not discuss anything about running the actual server. To accomplish this, there are the following three options:
- Commands
- Scripts
- Services
I do not recommend using commands - it is a pain to remember the exact two commands to run, and it can get a bit tedious. You could use command line aliases, but this is a bit of a pain too, the same is true of authoring two bash scripts. Instead, I would recommend creating two services. The services are easier to manage if you are comfortable with systemd, but the scripts are quick and easy. I will only outline how to create the services below but have a look at the cMaNGOS Installation Intructions if you want to run your server using commands or scripts (they have good instructions).
There are two primary components (programs) that need to be started when running your cMaNGOS WoW vanilla server:
realmd: The login servermangosd: The game server
To manage the game server we need an account - this will be the same account you can log into the game with, but will also allow us to run commands on the mangosd server.
Start the Server and Create an Account
Since we need an account to do pretty much anything, we should go ahead and create it now. This process will also provide some insight into running the server, as we need to start the server to make an account. Well, we could create the account in the database directly, but I like this method more as it provides experience running the server before making a service to run it.
To kick things off… we need to start the realmd program. This will start the realm that provides the functionality for users to log into the server and select a realm to play on. This is pretty simple to achieve. Open a new terminal window and enter the following command.
cd ~/wow/mangos-classic/run
./bin/realmd -c etc/realmd.conf
Please note that you must put a dot-slash (./) before the command to run it as a program. When you enter this command, you should see output similar to the snippet below.
CMaNGOS Classic/0.18 (2019-03-21T11:22:39+01:00 - 6713224f59f00a4f00836665a69b9ab59ac337b9) for Linux_x64 (little-endian) [realm-daemon]
<Ctrl-C> to stop.

Using configuration file etc/realmd.conf.
Login Database total connections: 2
MySQL client library: 5.7.25
MySQL server ver: 5.7.25-0ubuntu0.16.04.2
MySQL client library: 5.7.25
MySQL server ver: 5.7.25-0ubuntu0.16.04.2
Added realm id 1, name 'Vanilla'
Note that this program will run, and keep running in the terminal. You should not close it! Now, we want to open a new terminal to start the game server, or mangosd program. This is a very similar command.
cd ~/wow/mangos-classic/run
./bin/mangosd -c etc/mangosd.conf -a etc/playerbot.conf
When you start the mangosd program you will see a lot of output as the game server loads. Hopefully, everything loads correctly, and you will finally be presented with the mangos console prompt.
mangos>This is the console where we can enter commands and get the game server to perform specific tasks; for example, create a user account. This is actually what we will do now. I found some of the commands and syntax to be a little confusing at first, so I have documented the syntax, followed by examples in the documentation below. Start by creating a new account.
SYNTAX:  account create <username> <password>
EXAMPLE: account create admin ilovethehorde
The above example creates a user called admin with the password of ilovethehorde. Next, we want to set the expansion version for the user account. We have installed a vanilla server, so we want to set the account expansion version to 0 for vanilla (1 is TBC etc.).
SYNTAX:  account set addon <username> <expansion-version>
EXAMPLE: account set addon admin 0
Lastly, we will set the account privilege. For normal players, you would not usually set this value, but we want Administrator privilege so that we can properly manage the server. The available privilege levels are:
0: Player1: Moderator2: Game Master3: Administrator
Make sure you set your account to the Administrator privilege using the following command.
SYNTAX:  account set gmlevel <username> <level>
EXAMPLE: account set gmlevel admin 3
Done! We have run the server once, and successfully made an account! Make sure that you shut down the mangosd and realmd programs. In the mangos> console, use the .server shutdown command to halt the game server gracefully. In the realmd terminal, just use Ctrl + C to cancel the process so that it stops running.
Running your Server using systemd Services
The best method for running your WoW Vanilla server is to use systemd unit files. I really recommend this method as it provides better control of the server startup and shutdown process, and is simply easier to manage. You can only use unit files if your Linux system uses systemd. If you have never used unit files I would recommend reading this tutorial from Digital Ocean about Understanding Systemd Units and Unit Files. If you have used System 5 init - it is pretty much the same (well, not really). The old service command still exists in most newer Linux systems, which is a symbolic link to the new systemctl command used by systemd.
I got the primary content for my systemd unit files from a post called Mangosd systemd service existing on the GetMangos forums. So many thanks to them for providing the foundation for these systemd unit files.
The best location to create a new unit file is in the /etc/systemd/system/ directory. We will start by making the unit file for starting the realm. Create, then open the file using the vim editor.
sudo vim /etc/systemd/system/realmd.serviceNote that the name of this unit file will be realmd.service. The shortened name, realmd, can be used when managing the service. Inside of the newly created realmd.service, paste in the following text.
[Unit]
Description=WoW Vanilla realmd service
After=network.target mysql.service

[Service]
Type=simple
User=manager
ExecStart=/home/manager/wow/mangos-classic/run/bin/realmd -c /home/manager/wow/mangos-classic/run/etc/realmd.conf
Restart=on-abort

[Install]
WantedBy=multi-user.target
A couple of notes here. You must change the User= value to the name of your user account. In my previous tutorial, I documented that the user on my server is named manager, that is why I have specified User=manager. Next, you must also change the directory locations in the ExecStart= value. Again, I have used manager when specifying the home directory, and location of the cMaNGOS install location - you will need to update these paths to the correct value for your user account.
Next, we want to create another unit file for the mangosd program. We will create a similar file in the same location as the realmd.service file.
sudo vim /etc/systemd/system/mangosd.serviceNext, copy and paste the following text into your new mangosd.service file.
[Unit]
Description=WoW Vanilla mangosd service
After=network.target mysql.service realmd.service [email protected]

[Service]
Type=simple
User=manager
StandardInput=tty
TTYPath=/dev/tty3
TTYReset=yes
TTYVHangup=yes
WorkingDirectory=/home/manager/wow/mangos-classic/run/bin
ExecStart=/home/manager/wow/mangos-classic/run/bin/mangosd -c /home/manager/wow/mangos-classic/run/etc/mangosd.conf -a /home/manager/wow/mangos-classic/run/etc/playerbot.conf
Restart=on-abort

[Install]
WantedBy=multi-user.target
This unit file is a little more complex. Again, make sure you change the User=, ExecStart=, as well as the WorkingDirectory= value to the correct username on your system. One key difference in this unit file is that we specify a tty (terminal) for the mangosd service to run on.
When you have created both unit files, make sure to reload systemd so that the new files are discovered.
sudo systemctl daemon-reloadIt is probably a good idea to enable the services so that they both start when the server is restarted. I don’t do this, as I am not playing much and like the manually start the servers. The command to ensure both services are automatically started at boot are:
sudo systemctl enable realmd
sudo systemctl enable mangosd
Like I mentioned, I like managing the services manually using systemctl commands. The basic structure of the systemctl command for managing services is:
sudo systemctl <start|stop|restart|status> <service-name>If you are new to systemd, these might be a little funky. So I have documented some essential commands with a description of what they achieve:
sudo systemctl stop realmd      # Stop the realm
sudo systemctl start realmd     # Start the realm
sudo systemctl restart realmd   # Restart the realm
sudo systemctl status realmd    # Check the status of realm
In the above examples, you can change the name of the service from realmd to mangosd - depending on what service you want to manage. These services are essential, so getting used to stopping, starting, restarting, and checking the status of the services is important. I find myself managing the mangosd service much more, as modifying the mangosd.conf file requires a service restart to apply the changes to the running server.
Connecting your WoW Client to your Server
So far we have installed the server, then set up a suitable method to start the server (systemd services). The next logical step is to try to connect to the server. We already have a username and password configured for the server, which we performed in the last step. Now we just need to configure the WoW client… and maybe (depending on your server scenario) configure the server for remote connections.
Configure your Server for Remote Access
If you have your cMaNGOS server installed on a different system then the client you want to run, you will need to configure the realmd server for remote access. Basically, we just need to set the IP address of the server in the realm configuration. However, we have to edit this in the MySQL database, instead of the usual realm configuration file (the realmd.conf). If you are running the WoW client and server on the same system you can skip this section.
Start by logging into the MySQL command prompt. To do this, you will need the password for the root user, or the password for the mangos user. You created both in the first part of this tutorial.
mysql -uroot -pWhen prompted, enter your password for the root account for MySQL. You will be presented with a mysql> prompt. Now we want to use a specific database and edit it.
OK, we want to change the IP address that is specified in the realmlist table in the classicrealmd database. After we have used the classicrealmd database, we can easily edit the realmlist table using the following command.
UPDATE realmlist SET address='192.168.1.49' WHERE id='1';You will need to change the IP address in the example provided to the address of your server. Remember, you can use ifconfig or ip a to see your IP on Linux-based systems. Make sure to check that the change has been applied.
SELECT * FROM classicrealmd.realmlist;Connecting your WoW Vanilla Client
After that last configuration for the server, we can now set up the client to connect to the server. This process is pretty easy - in comparison to the work we have done so far. The first thing, you need a vanilla WoW client - specifically with patch 1.12.1. You should already have this, as you needed it in the first post when installing the server. Inside the client folder, there is a file named realmlist.wtf. Open this file in any text editor, and set the IP address of your server. If your client and server are on the same system, you can use 127.0.0.1. Otherwise, you will need to enter the IP address of the remote server. In my example, my server IP is 192.168.1.49 - so my realmlist.wtf will have the following entry.
set realmlist 192.168.1.49We have finally got to the point of actually running the WoW client! Start the client by running the WoW.exe file. Do not use the Launcher.exe file!!!!! If everything worked correctly, you should be able to login to the server.
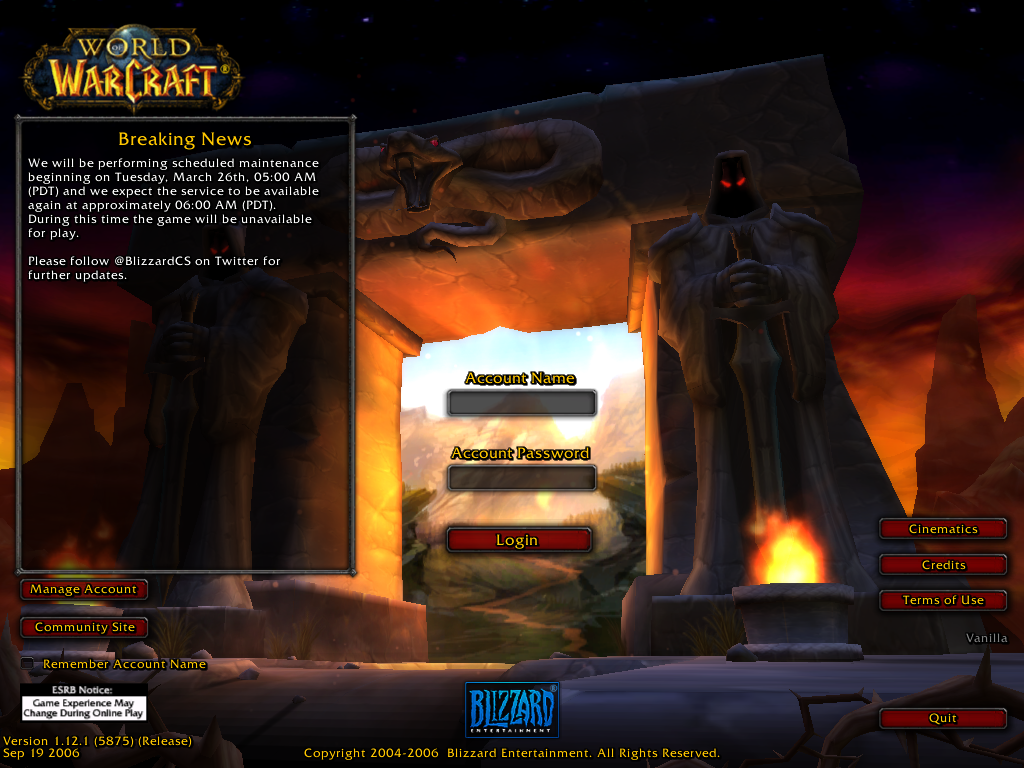
You can use your account that you created at the start of this post to log in. You will then be presented with the realm selection options.
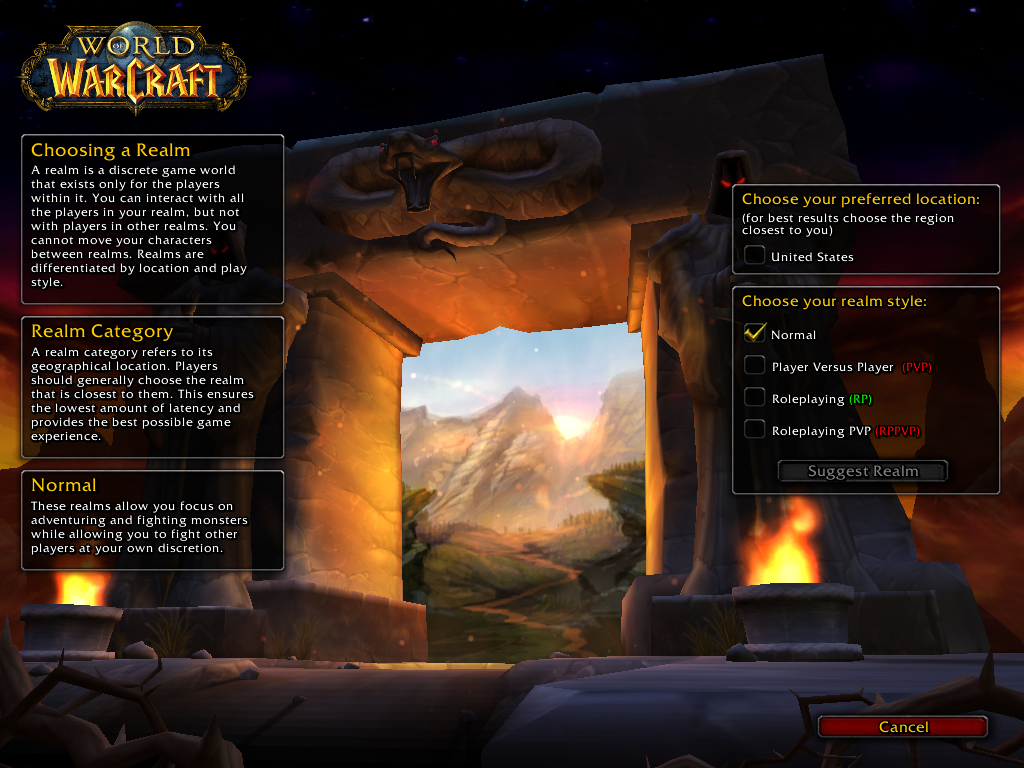
You should be able to select the United States option and see the name of your Vanilla server. At this point, you can actually connect to the realm, create a character and start playing the game. I would recommend doing this to check that everything is functioning correctly.
Configuring the WoW Vanilla Client to run on Linux
This section is a quick summary of running the WoW vanilla client, with patch 1.12.1, on Linux. This section will not go into finer details of all the different configurations and troubleshooting the WoW vanilla client on Linux. Rather this is a quick guide that should work for most people.
Start by installing the wine software package.
sudo apt install wineNext, copy the WoW vanilla client to the .wine folder in your user’s home directory.
~/.wine/drive_cInside this folder is the normal structure of a Windows operating system. Put the WoW client into the Program Files directory. Then you can simply run the client using the following commands:
cd ~/.wine/drive_c
wine "C:\Program Files\World of Warcraft\Wow.exe" -openglv
A key part of this command is running the Wow.exe program with the -openglv argument, to force the client to use OpenGL graphics. If these instructions do not work for you, have a read of the WINE Installation and Configuration Tutorial on Linux, and also try searching for errors you encounter.
Modifying the Database
We have already had a brief chat about modifying the different databases that we previously installed.
classiccharacters: Contains information about every character including skills, talents, inventory and bank information.classicmangos: Contains everything about the game including items, NPCs, and objects.classicrealmd: Contains the base game server and player account information.
Access the Database
The best method to access the database is to log into the MySQL command prompt. You could also install a GUI tool - but the overhead and additional software seem non-essential. To access the MySQL prompt, you will need the password for the root user, or the password for the mangos user. You created both in the first part of this tutorial. Log in using the command provided below:
mysql -uroot -pYou can manage the database in this console. For example, to see all the databases in your MySQL install run the SHOW DATABASES; command. Example output (that has been redacted) is provided below.
mysql> SHOW DATABASES;
+--------------------+
| Database           |
+--------------------+
| classiccharacters  |
| classicmangos      |
| classicrealmd      |
+--------------------+
3 rows in set (0.04 sec)
For any specific modification, we need to edit the required database. For example, to modify entries in the classicrealmd database you have to select it using it, as illustrated in the following command.
USE classicrealmd;Once selected, you can view tables and the information contained within them using various MySQL commands. As a quick example, you can list all the tables in the classicrealmd database using the SHOW TABLES; command. Again, example output is provided below.
mysql> SHOW TABLES;
+-------------------------+
| Tables_in_classicrealmd |
+-------------------------+
| account                 |
| account_banned          |
| ip_banned               |
| realmcharacters         |
| realmd_db_version       |
| realmlist               |
| uptime                  |
+-------------------------+
7 rows in set (0.00 sec)
I will not go into the basics of MySQL command syntax. But a quick read of a tutorial should help understand the basics.
Changing the Realm Name
One interesting example of database modification you want to change is the realm name - which has to be done in MySQL console. I really wanted to do this, and took a while to find this option. So I thought I would document the process below.
UPDATE classicrealmd.realmlist SET name='Vanilla' where name='MaNGOS';List all Player Accounts
Another useful example of the cMaNGOS database is managing user accounts. All player account information is stored in the classicrealmd database, in the account table. This includes account ID, account name, and account password (surprisingly stored using the SHA1 algorithm by default).
To determine all of the available entries in the specific table, you can use the DESCRIBE command, as displayed below,
DESCRIBE classicrealmd.account;From here you can SELECT specific entries, such as the account username.
SELECT username FROM classicrealmd.account;There are many other commands, these are just a couple of examples to help anyone get an idea of what can be done, and how it can be done in the database.
Modifying the Server at Runtime
So far we have installed the server, set up a suitable method to start the server (systemd services), then actually connected to the server using a patch 1.12 client. Now we will start making some modifications to the server while it is running. Then we will discuss GM commands, which can also be run in the server console or in the in-game chat.
Accessing the Remote Administration Console
The best method for connecting to, and accessing the server is to use the Remote Administration console. When you connect to this console, you will be presented with a mangos> prompt where you can execute specific commands.
The console is enabled by default, but remote access is not enabled. The settings for the remote console are in the etc/mangosd.conf file. The block of settings below shows a little summary of my configuration.
Console.Enable = 1
Ra.Enable = 1
Ra.IP = 192.168.1.49
Ra.Port = 3443
Ra.MinLevel = 3
Ra.Secure = 1
Ra.Stricted = 1
Just read the documentation in the configuration file for more information. I have remote access enabled with only the IP of the server allowed (I could not get the console to work without turning remote access on).
Since we are running the mangosd as a service, we cannot get access to the admin console when we run the program - usually, the admin console would appear after loading the mangosd program. Instead, I connect to the console using the netcat tool, using the nc command.
The command below demonstrates how to connect to the admin console. The nc command needs to be followed by the IP address of the server, and the target port.
nc 192.168.1.49 3443Running the command command at the mangosd prompt will list all of the available commands, as displayed below.
Welcome to the Continued Massive Network Game Object Server.
Username:
Password:
+Logged in.
mangos>commands
Commands available to you:

    account ...
    ahbot ...
    character ...
    debug ...
    gm ...
    guild ...
    instance ...
    list ...
    lookup ...
    pet ...
    pool ...
    pdump ...
    reload ...
    reset ...
    server ...
    tele ...
    announce
    notify
    commands
    revive
    help
    saveall
    kick
    ban ...
    unban ...
    banlist ...
    ticket
    delticket
    pinfo
    send ...
    loadscripts
    mute
    unmute
    repairitems
Running each command will provide an indication of how to use the command. Each command is pretty descriptive based on the command name, and running them will help identify the use of the command.
Server Game Moderator (GM) Commands
The next important thing to discuss is the use of Game Moderator, or GM, commands. These commands are used in-game when you have logged in and are playing on your server. You can enter GM commands in the in-game chat box. However, not that the GM commands are limited based on the account type that is set for a specific account.
Each GM command is always prefixed by a dot. As the first example, take the help command that is displayed below.
.helpNote that the command name (help) is prefixed by a dot (.). This command, like many others, can work with a command argument. As an example, you can print the help menu for a specific command, by using the command name as an argument. For example, the account command can be used to manage some aspects of a players account. The help menu for the account command can be accessed using the following command:
.help accountI would recommend getting used to the different GM commands, as they are very useful. I have documented some of the more useful commands in this section, commands that I think are the most useful when starting to run your own WoW classic server. However, there are many more! Also, the result from these commands could also be implemented using other methods - for example, editing the database directly. Anyway, below is a list of useful commands:
- Level character to 60
.character level 60- Learn all spells, talents, etc. for your class
.learn all_myclass- Learn all spells for your class
.learn all_myspells- Learn all talents for your class
.learn all_mytalents- Increase skills
.maxskill- Reset talents, level, spells, and stats
.reset talents
.reset level
.reset spells
.reset stats- Learn a specific spell, based on the spell name entered
.lookup spell <spell-name>- Lookup a spell, then learn it
.lookup spell plate mail
.learn <id-number>- Add an item or item set
.additem <item-id>
.additemset <itemset-id>- Generate precious money! 1,000 gold.
.modify money 10000000You can also batch enter commands. For example, I have a list of Best in Slot (BiS) gear (pre-raid) for a Mage. I save this data in a text file, then copy and paste all the commands in at once to generate a full BiS setup for training.
# Mage BIS pre raid
.additem 22267
.additem 22403
.additem 11782
.additem 13376
.additem 14340
.additem 16683
.additem 13253
.additem 18740
.additem 19683
.additem 18102
.additem 22433
.additem 12545
.additem 12930
.additem 13968
.additem 13161
.additem 13938
This is by no means an exhaustive list. But for the sake of simplicity, I have only included a few examples. The help command will, well, help you find the different things you can achieve with GM commands. Also, there are a lot of cMaNGOS command lists floating around the Internet - but most seemed out of date.
Firewall
OK… so we got the server installed, then configured the basics. The final thing this tutorial covers are some measures that we should implement - so we can lock down the server (improve security). One important aspect is to implement a firewall. However, feel free to skip this section if you are not interested, as it is not mandatory.
I already had a firewall implemented on my server, so I had to insert additional firewall rules to allow my cMaNGOS install to function correctly. FYI - the Ubuntu Server version comes with the iptables firewall already installed, but not configured. So in this section, we will discuss the ports used by the default cMaNGOS WoW private server, and talk about how to correctly implement a firewall.
The primary ports used by cMaNGOS (and most other WoW Vanilla servers) are:
8085: The world server port3724: The realm server port3306: The database server port
Please take note that these are all default ports, and you can easily change them in the mangosd.conf and realmd.conf configuration files. Changing the ports would only be recommended in specific scenarios. One example is if you plan on hosting multiple servers on one system - so you will need to move (some of) the ports. Another reason is for security through obscurity, where you can change the default ports in order to increase security a little. For example, MySQL uses port 3306 by default and I always move the port to something else. This is not a huge deal but can help stop automated attacks.
A very simple iptables configuration is provided below. The provided example uses a default drop policy for incoming traffic, and no filtering on any out-going traffic.
sudo iptables -A INPUT -m state --state ESTABLISHED,RELATED -j ACCEPT
sudo iptables -A INPUT -i lo -j ACCEPT
sudo iptables -A OUTPUT -o lo -j ACCEPT
sudo iptables -A INPUT -p tcp --dport 8085 -m state --state NEW -j ACCEPT
sudo iptables -A INPUT -p tcp --dport 3306 -m state --state NEW -j ACCEPT
sudo iptables -A INPUT -p tcp --dport 3724 -m state --state NEW -j ACCEPT
sudo iptables -P INPUT DROP
This default configuration should only be used as a starting point. I do not implement this configuration, and wouldn’t use it on a production, Internet-facing server… but hopefully, the example provides a potential solution on which to build a more robust firewall.
Conclusion
This post carried on from the first post in this series called Installing a WoW Vanilla Private Server on Ubuntu Linux - where we installed the cMaNGOS classic private WoW server. In this post, we created a new account, created services to help manage the realm and game servers, connected a WoW client to our new server, and got the entire cMaNGOS installed up and running. Then we implemented some configurations in the game database, modified the server during run time using the admin console and GM commands. Finally, we discussed the use of a firewall briefly.
I really hope this tutorial was useful to you. When I first embarked on creating a WoW vanilla server, I couldn’t find a tutorial which guided me through the basics. I hope that this tutorial did achieve this - a kind of brief overview of every component needed with some explanations along the way.